
Family-Friendly Media Den Walk-Thru | Get the real scoop on an Interior Design Project
Have you ever wondered what it’s like to hire an interior designer for your project?
All designers work differently, but I have honed a project process over the last 15 years that ensures delighted clients, from single professionals, to families with kids and pets, to downsizing retirees.
Discovery
Design Concept
Detailed Design Plan
Order Management
Renovation
Delivery
Done
This article walks you through a recent project I designed, including details on the timeline and investment. Have a look at how we transformed this space from start to finish and saved the client money, time and stress.
This Media Den was designed for a family with four kids, ages 4 - 11, and their cuddly, large dog.
Discovery Phase
Client Synopsis
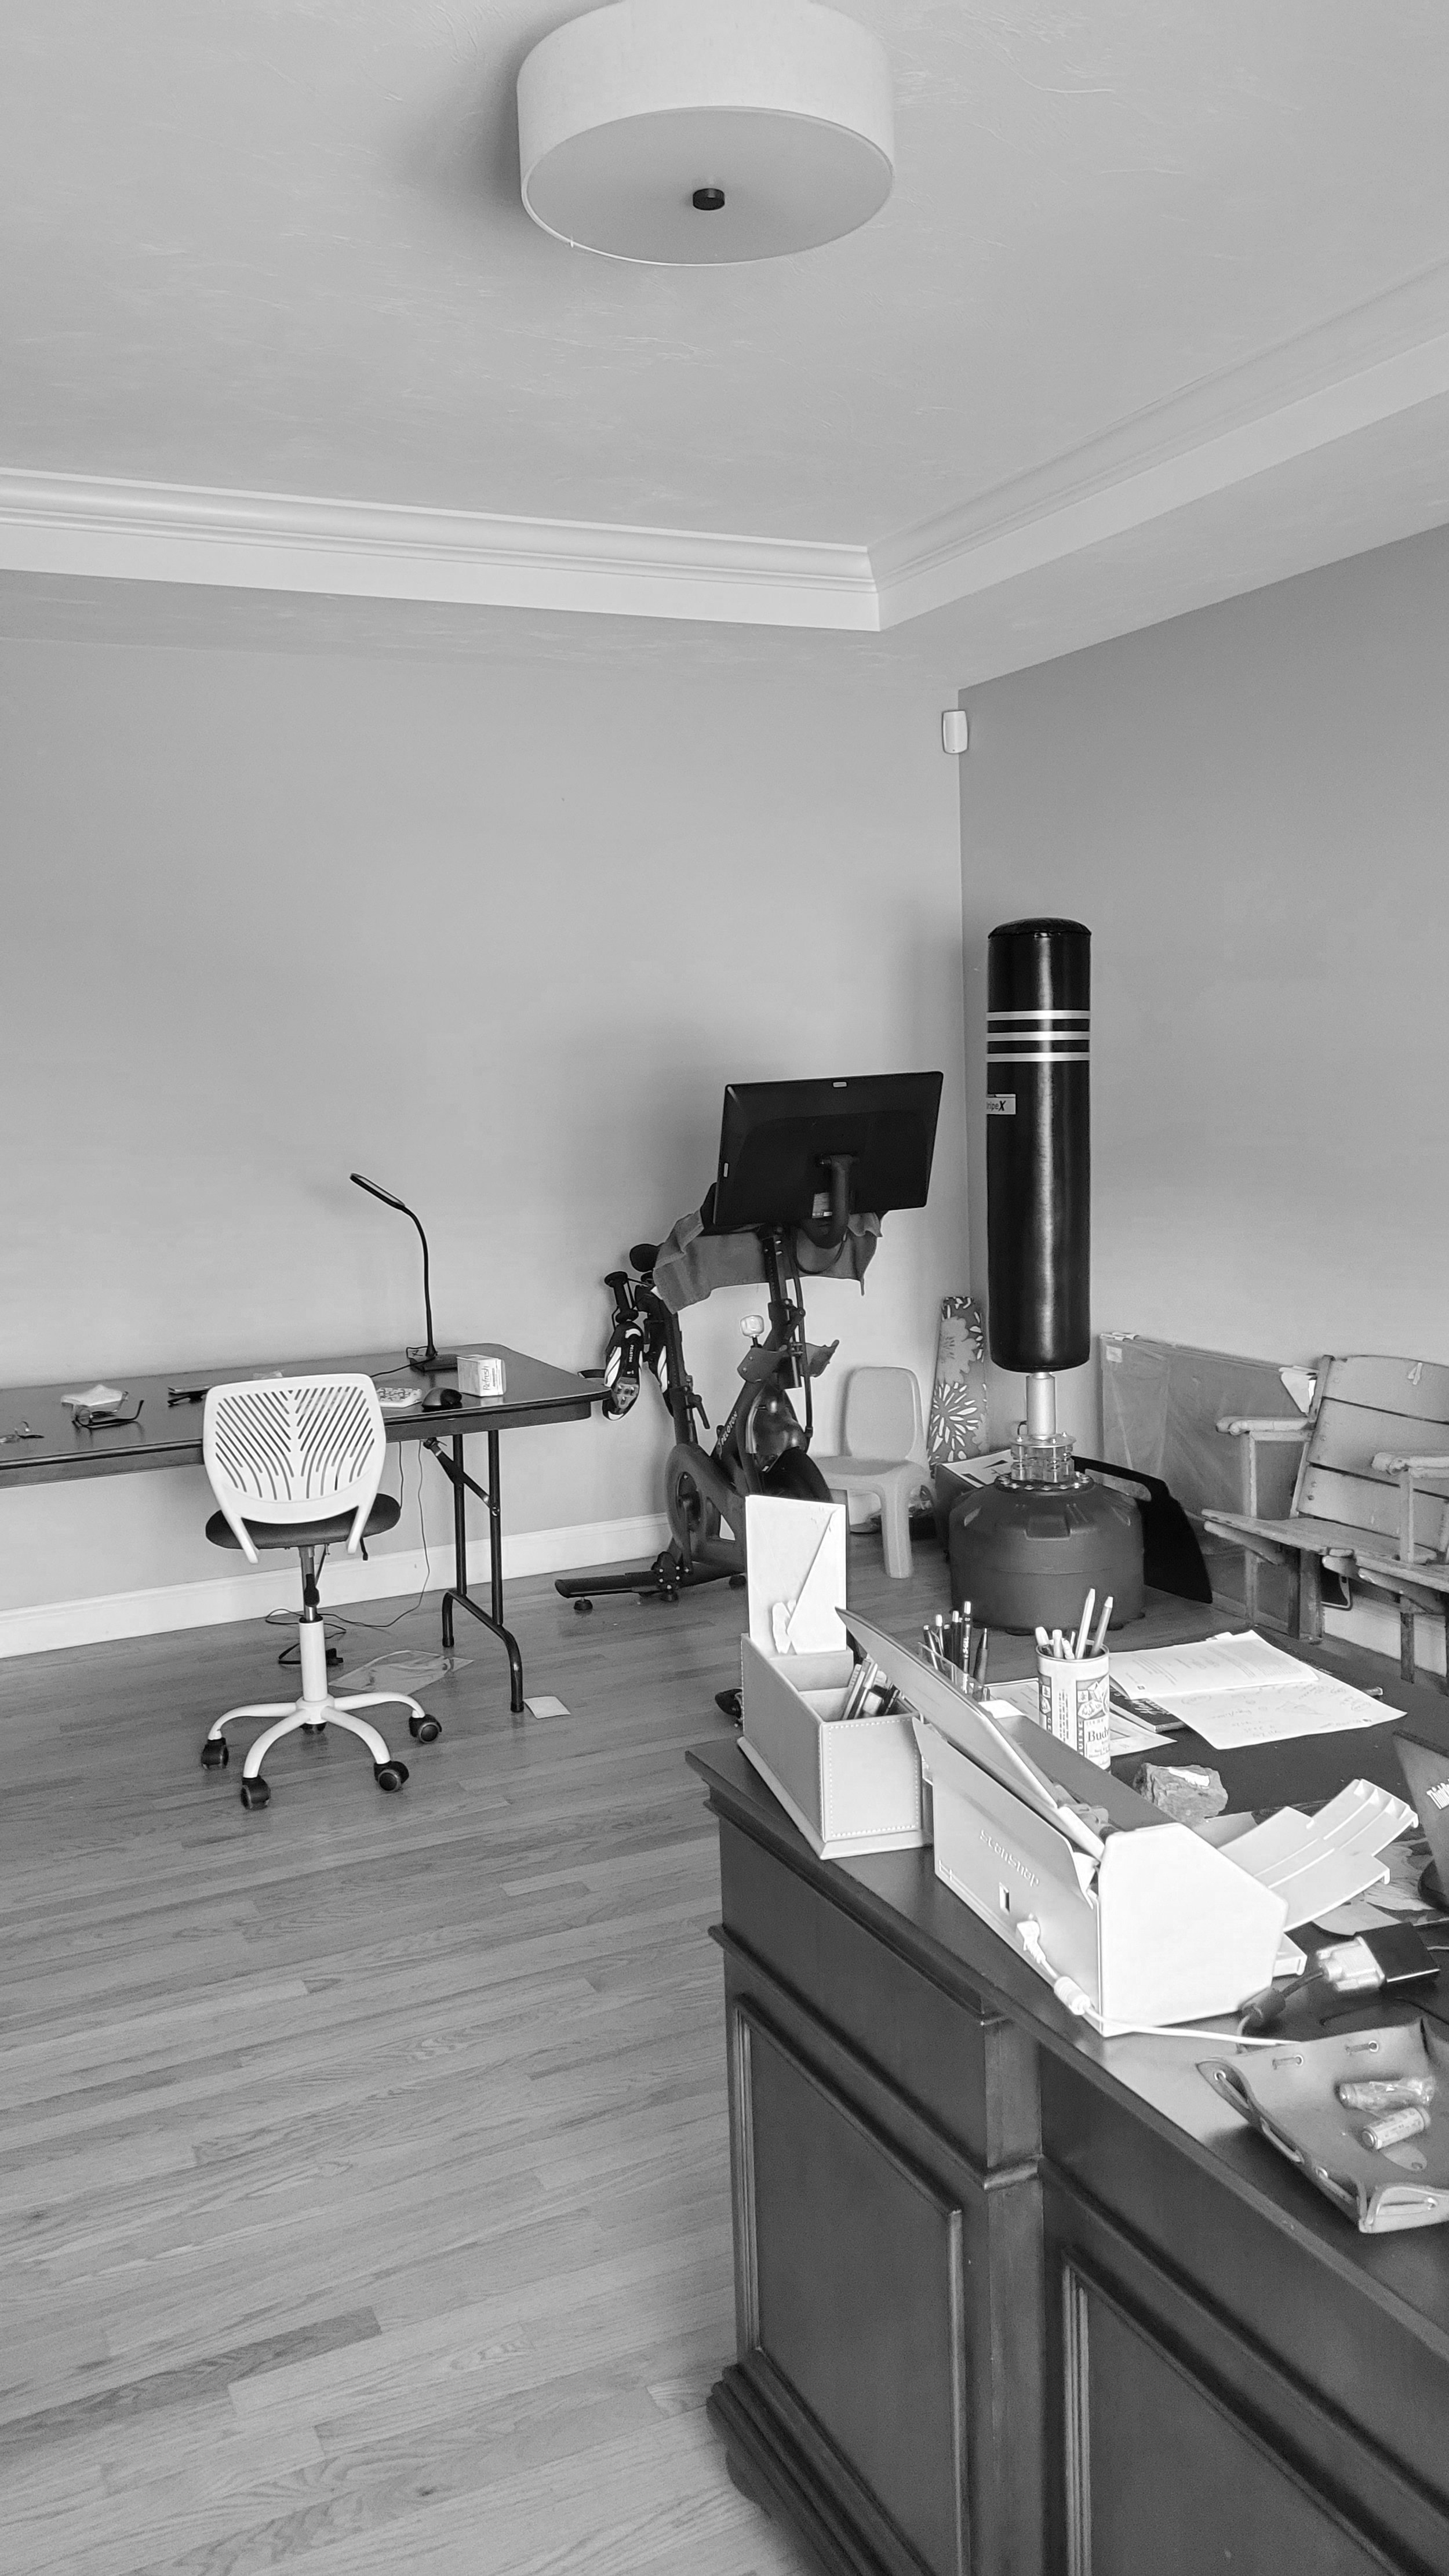
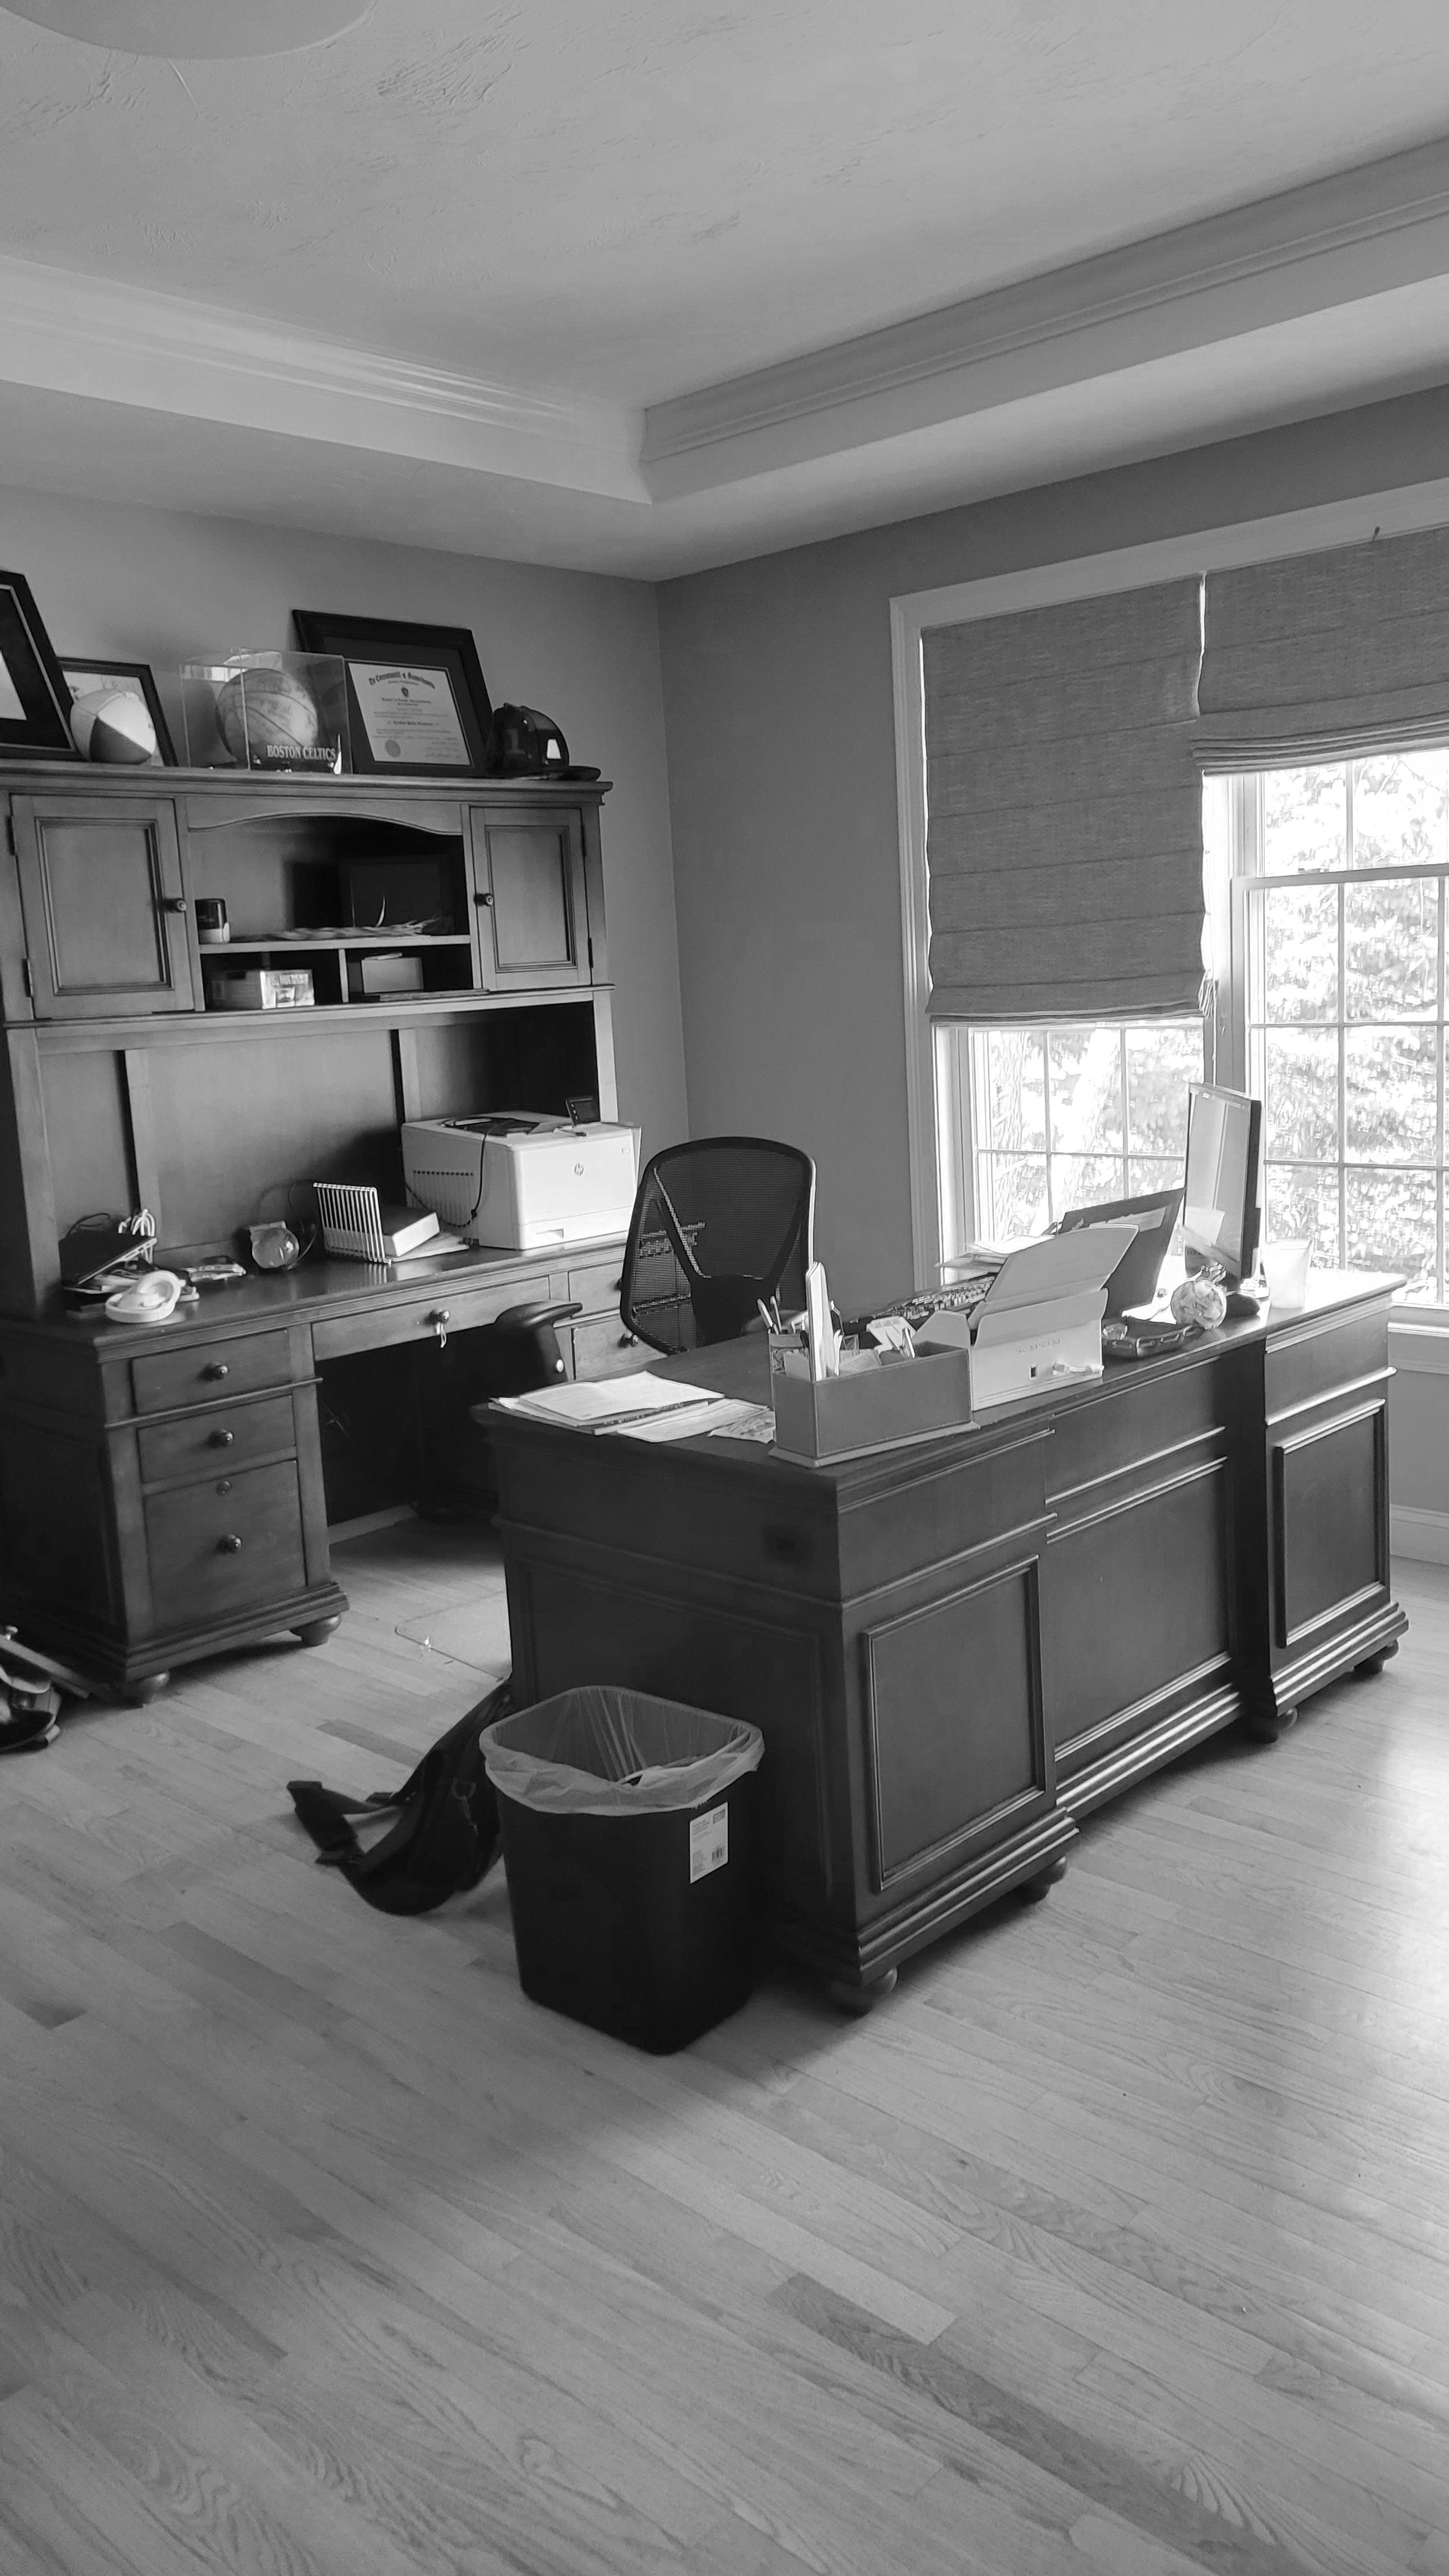
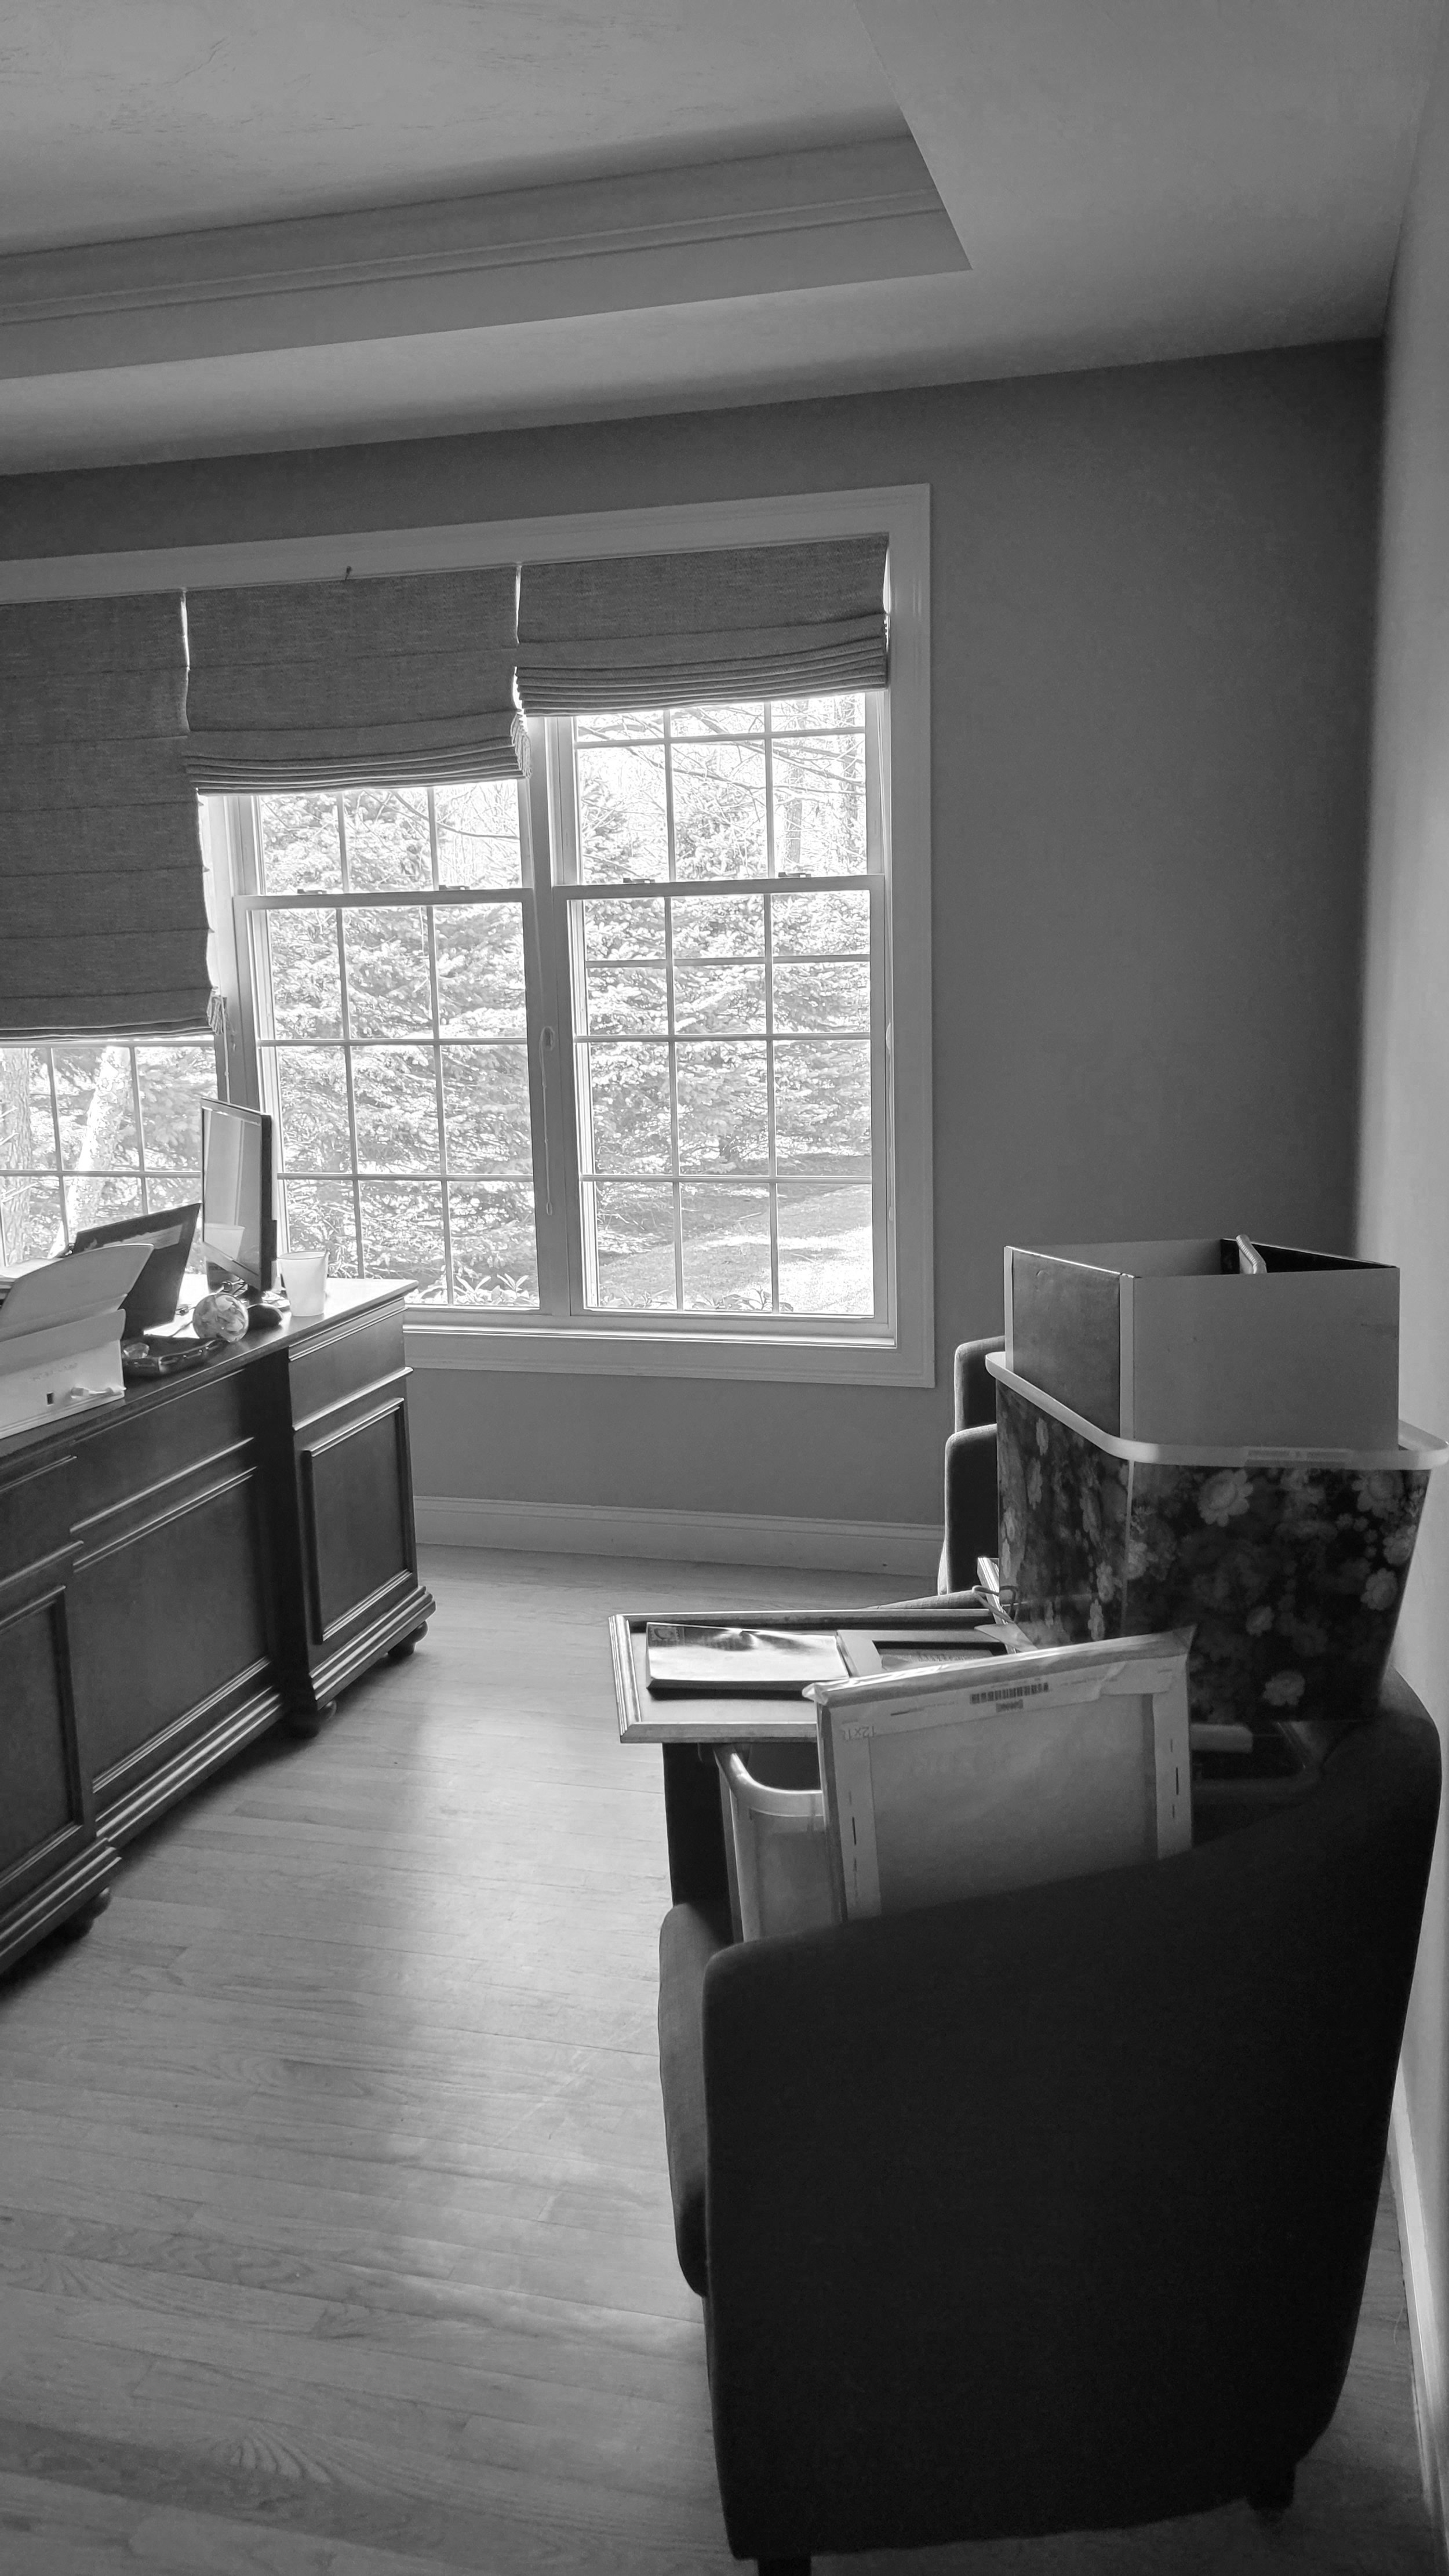
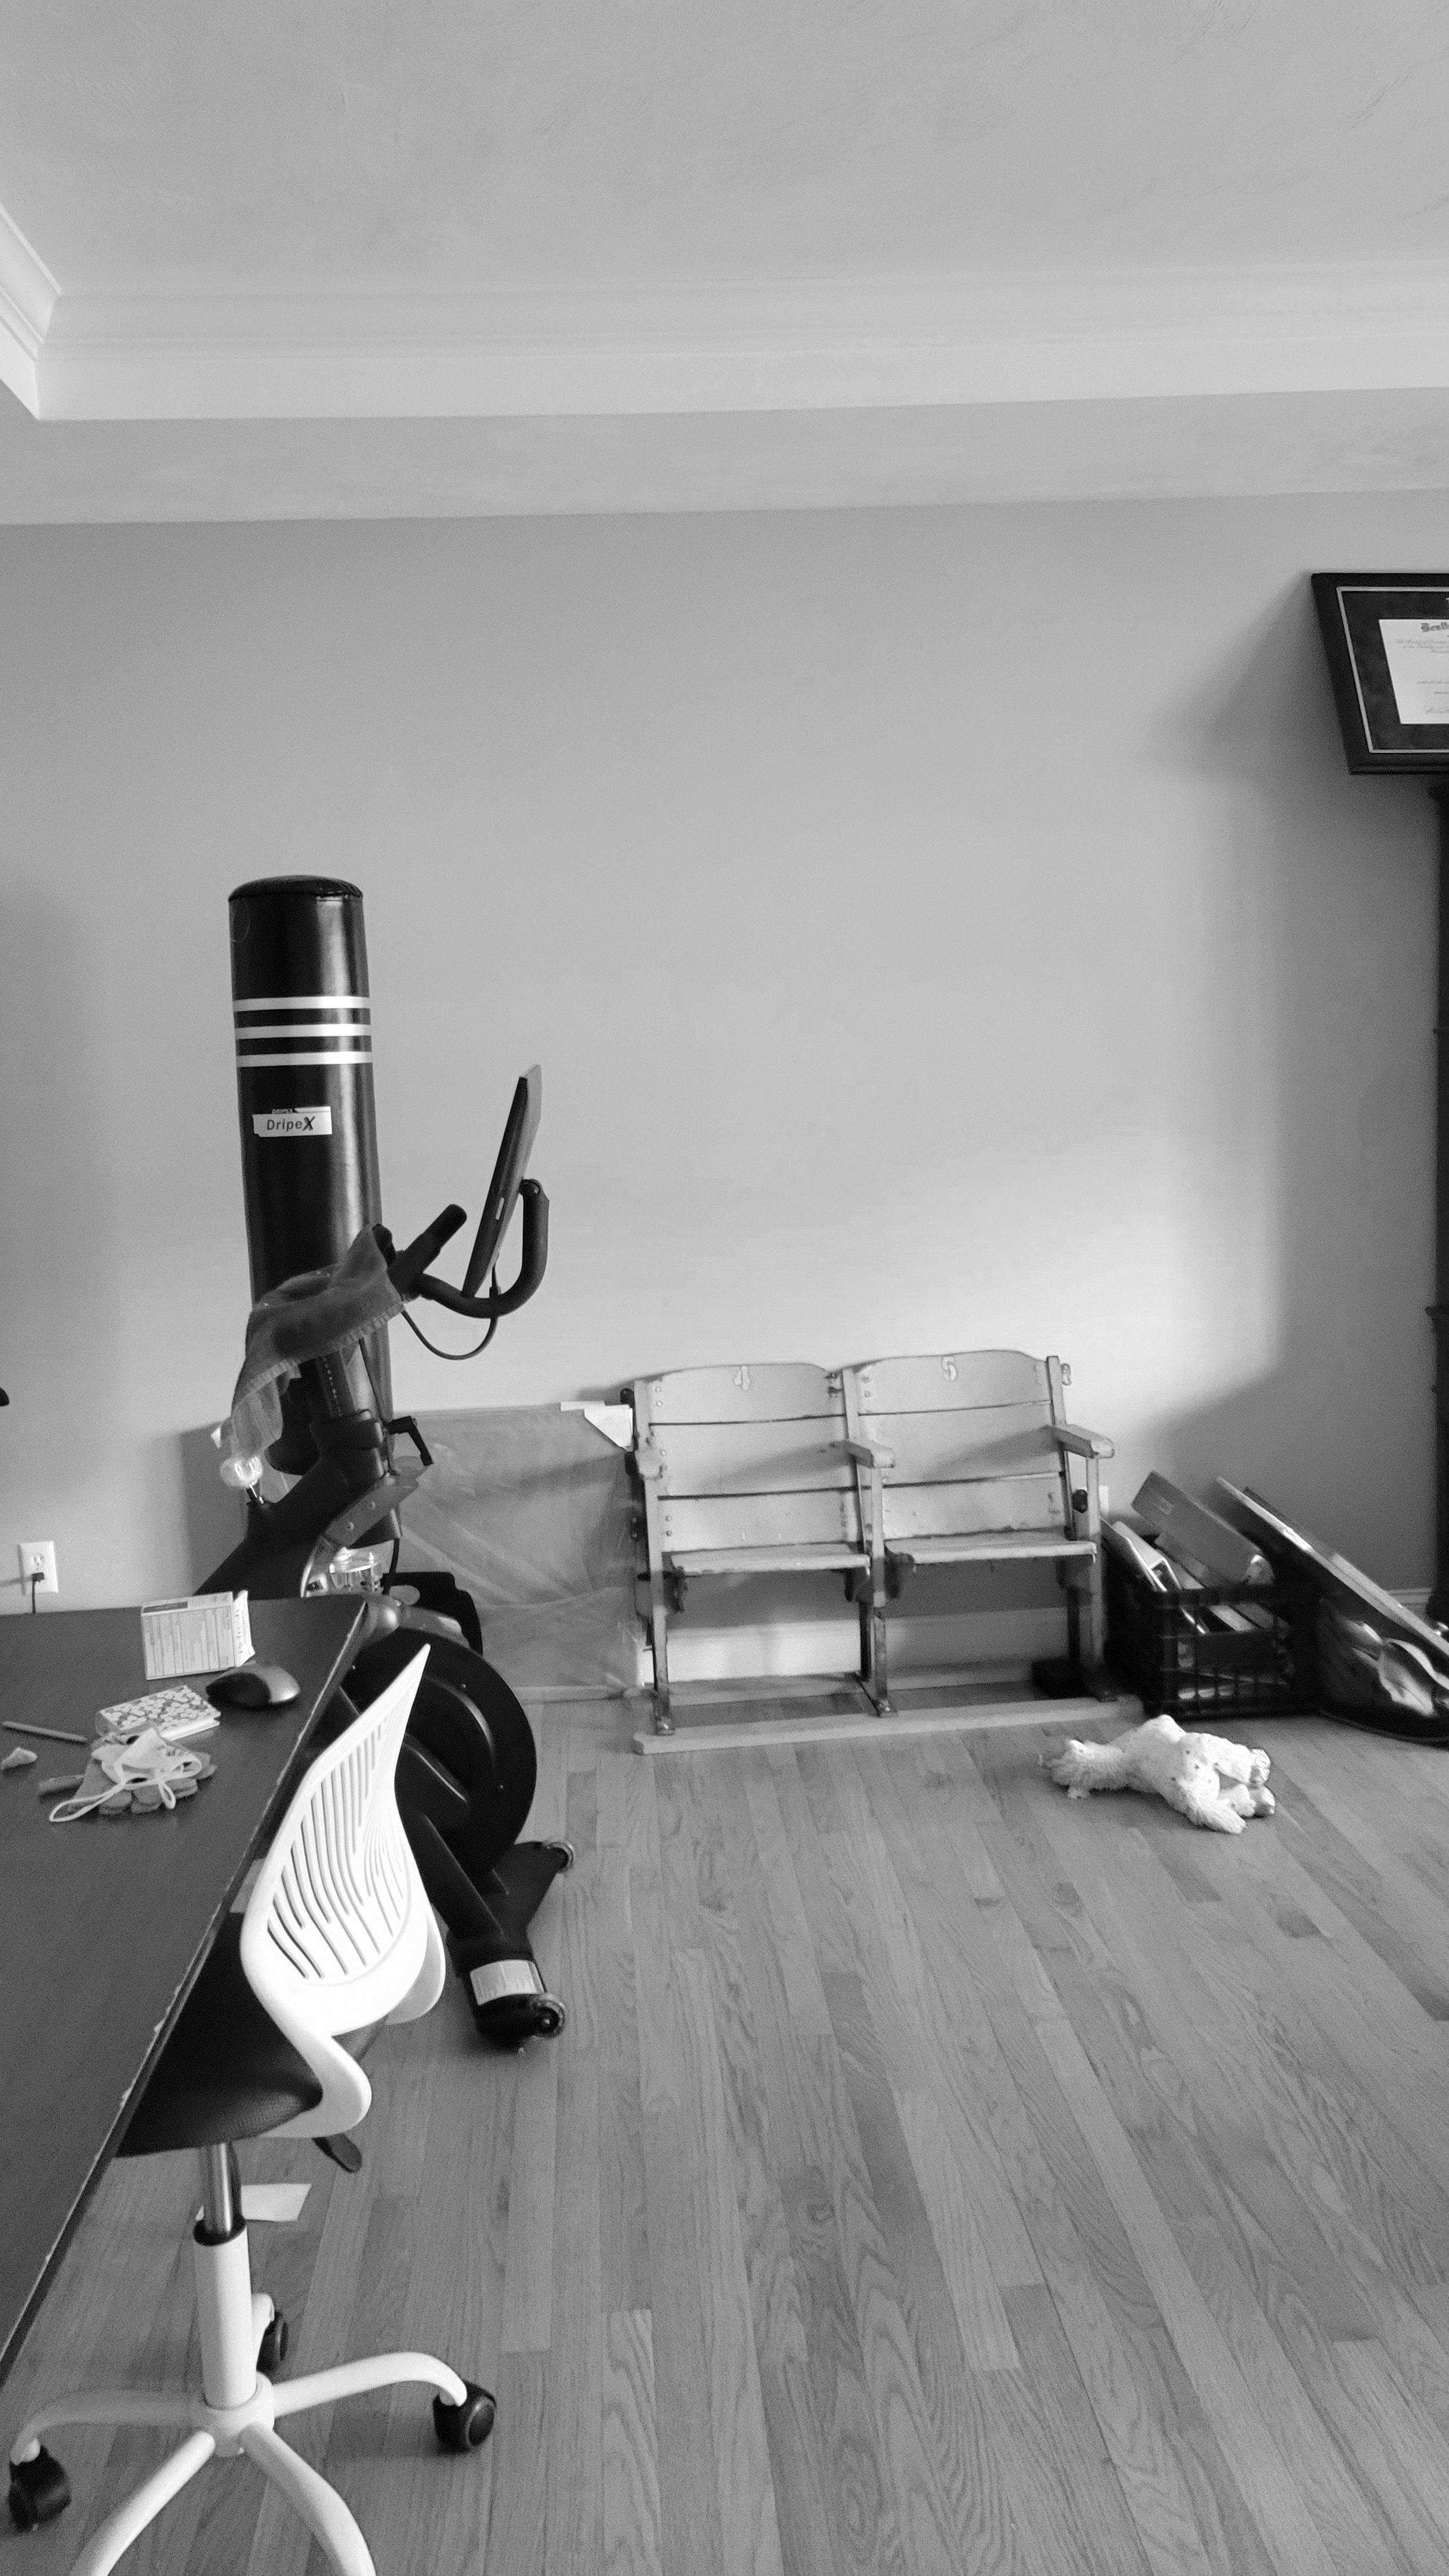
Let’s start at the beginning… This family had this large space with french doors off the entry foyer that was being used as an office. The TV was originally in another room, but the rest of the first floor is an open plan, so anytime the TV was on, the volume of EVERYTHING kept getting turned up. The primary objective was to relocate the office to the second floor and bring the TV into this room. This project actually included four rooms on the first floor of this home, but for simplicity's sake, I’ll only cover this space in this article.
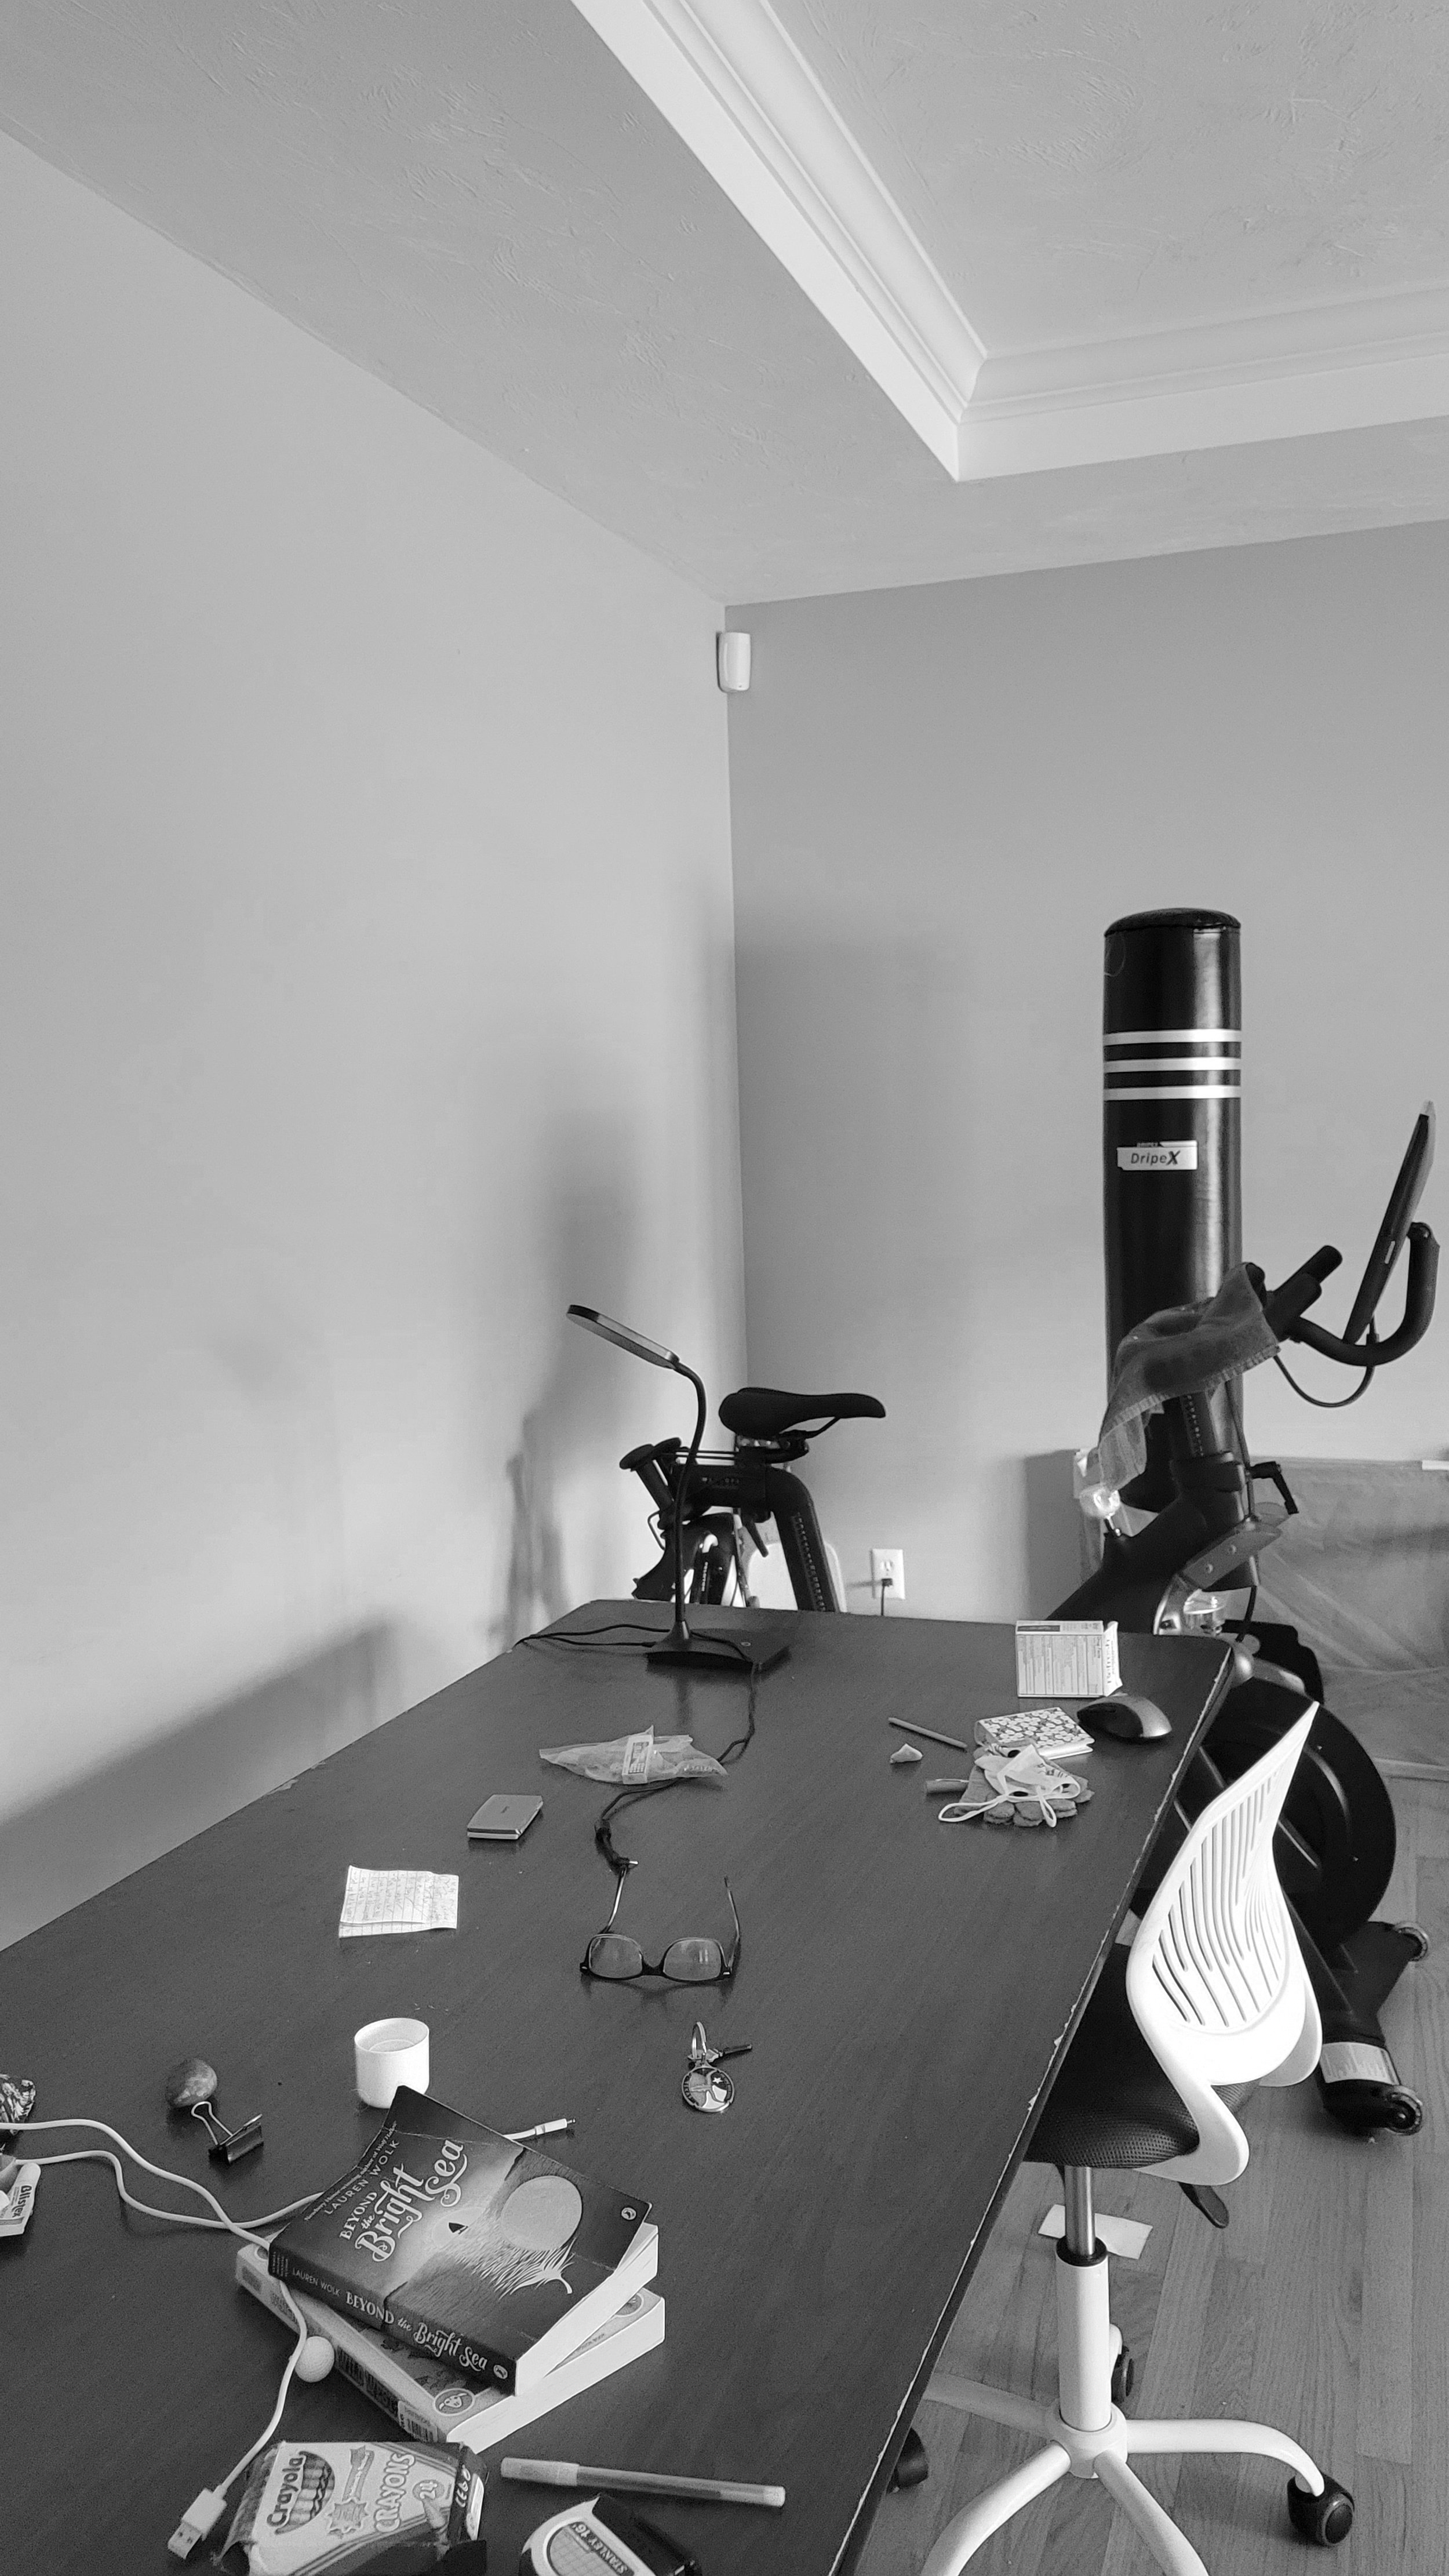
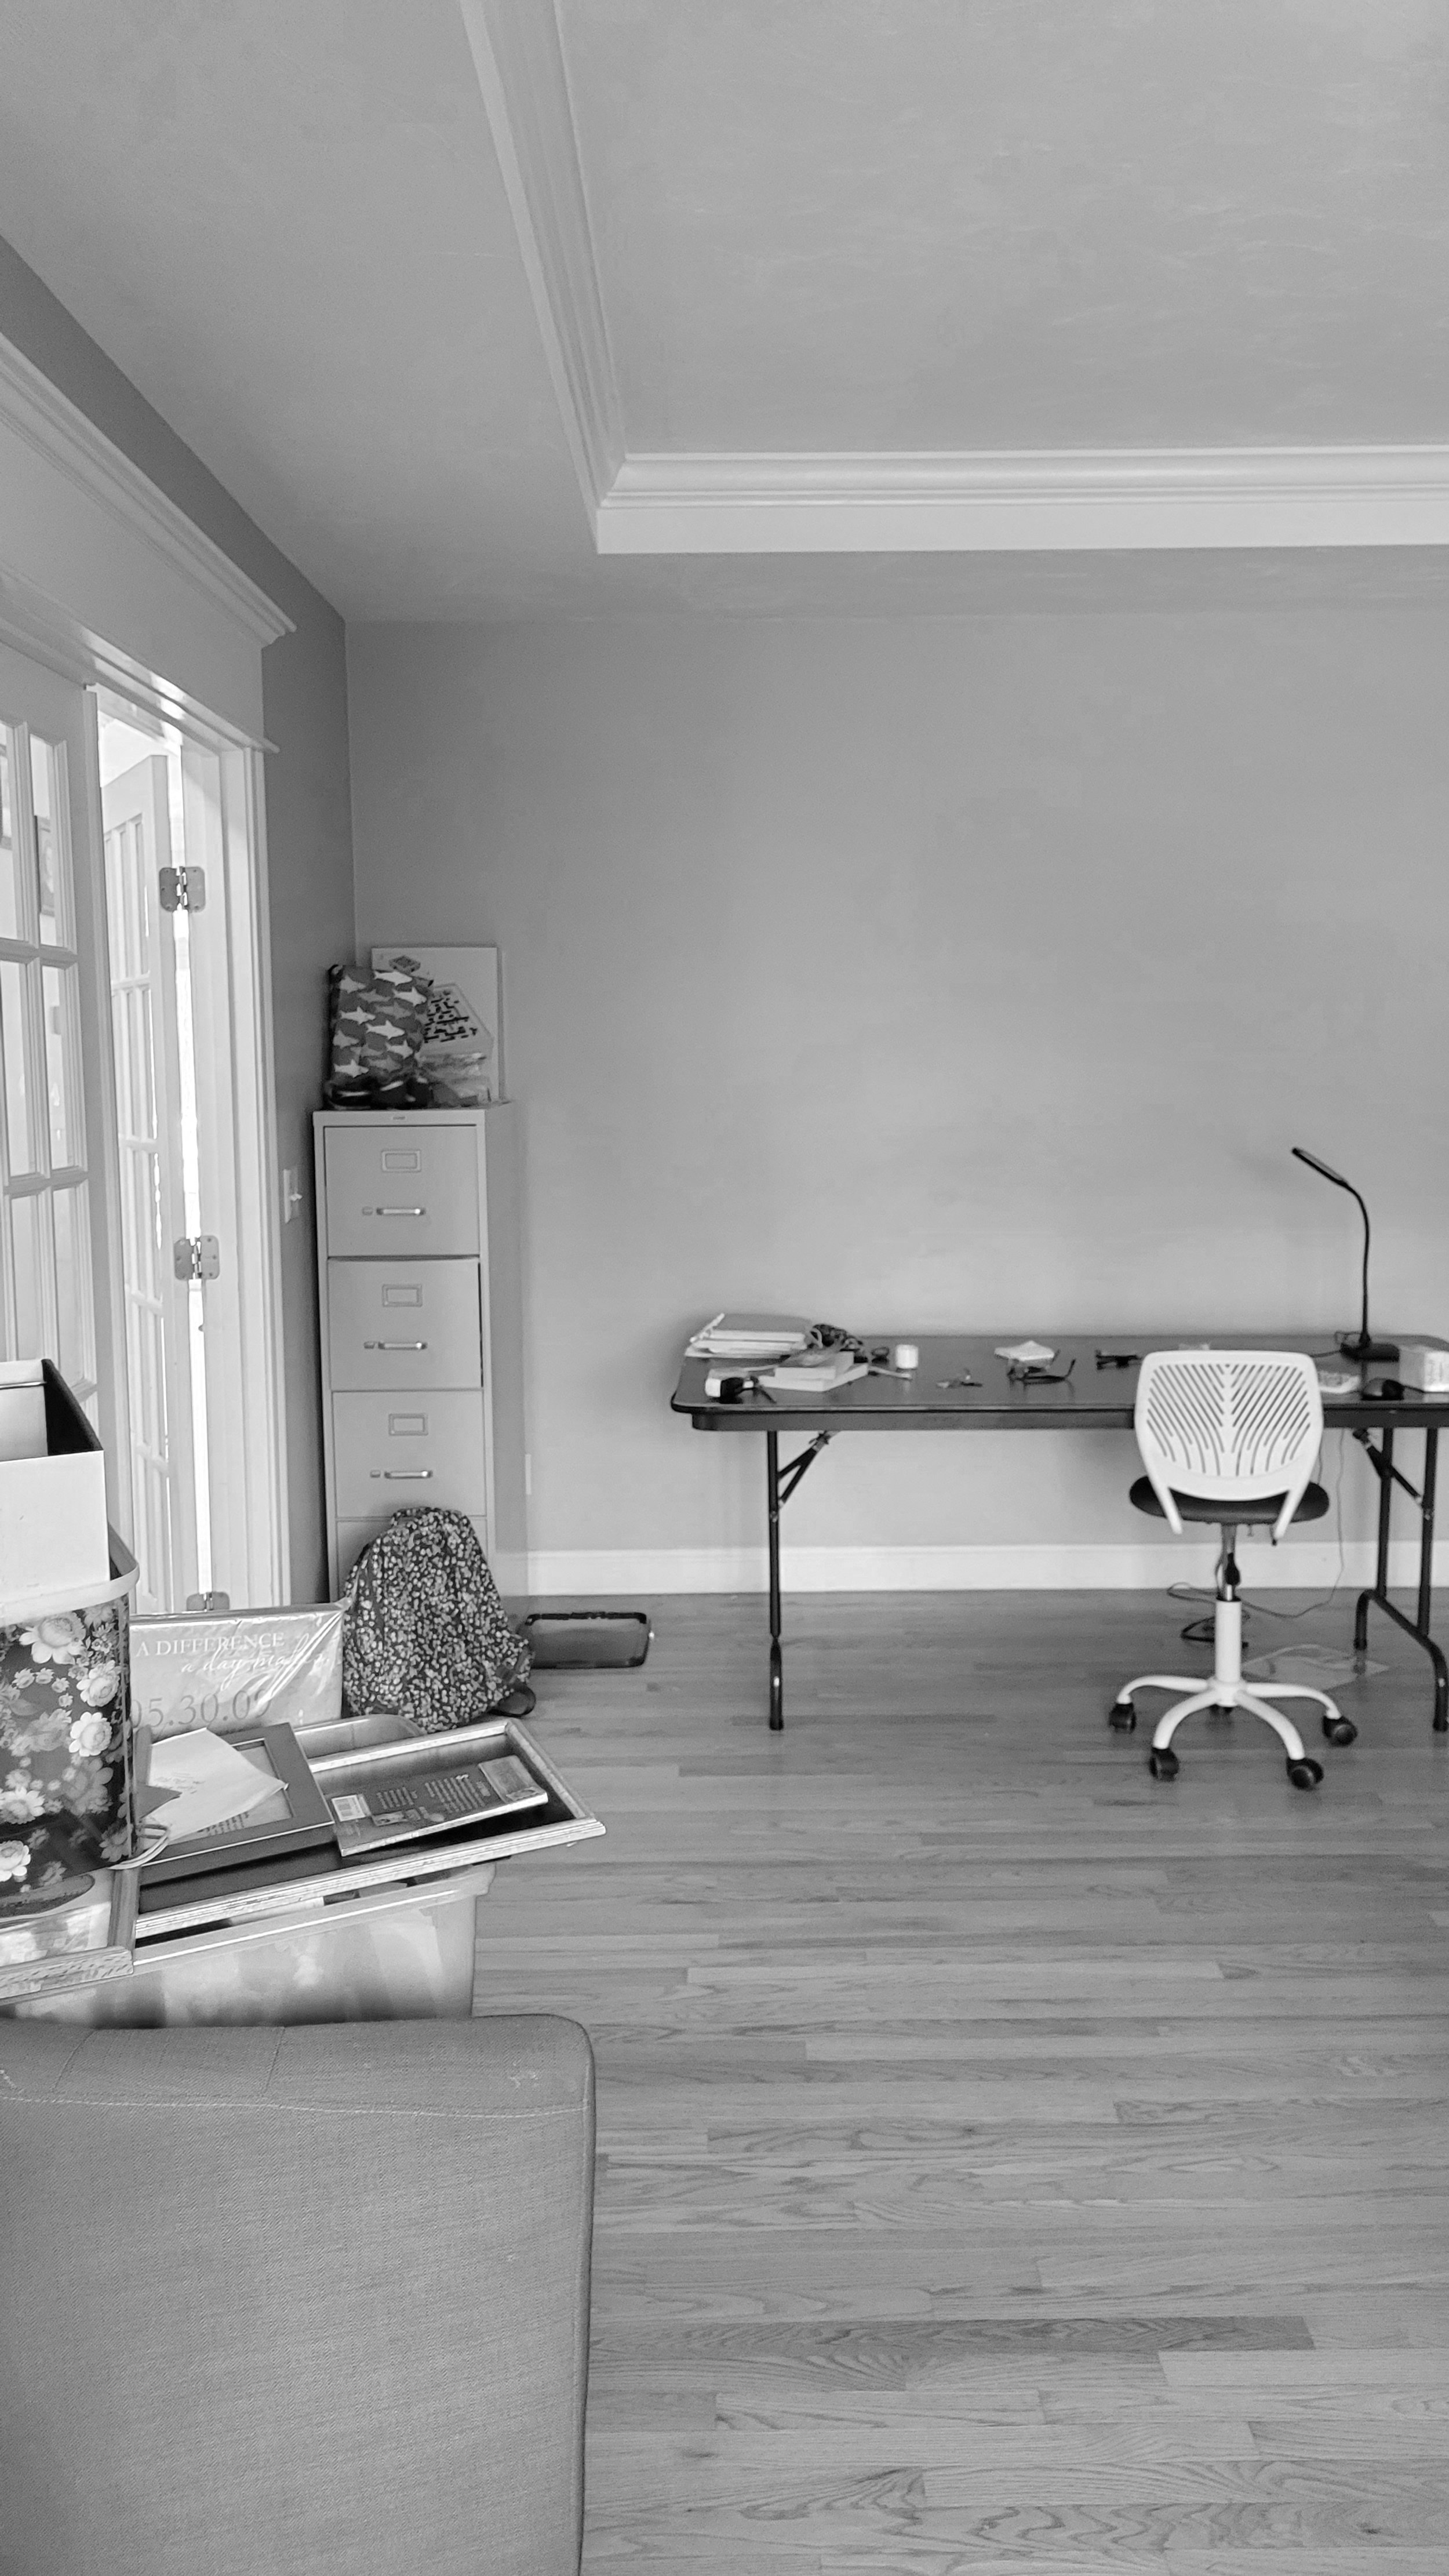
Here are some before images:
Initial Consultatation
I start every project with an initial 2-hour consultation because it gives me a chance to learn how my clients live and discuss their wants and needs for their space.
They wanted their home to feel: Happy, Easy-going, Cozy, Inviting, Family-oriented, Calm, Cheerful, Pet-friendly, Kid-friendly, and Practical. I knew from the beginning we had great bones and could make this space special.
Clients can ask any design question during a consultation. I recommend keeping our time to a few rooms and telling me what’s working and not working for you. What space in your home do you use the most? What space do you like the most? What do you dislike? What tasks/hobbies do you do regularly?
Another thing we cover in the consultation is what items they like and want to keep. We rarely start from scratch on a project - if something is loved and working, I will incorporate it into the plan. In this case, we decided to keep the wall color and window treatments as they were in good shape and fulfilled the function needed.
After the consultation, I developed the complete Scope of Work and my design fee and estimated the investment to execute the requests.
Scope of Work
good-sized room at almost 19’ x 15’
need seating for 6 plus a large dog
want a LARGE sectional
need durable, low-maintenance finishes
need floor space for kids to play
want giant TV and sound bar
need storage for kids’ games/toys
move some electrical and modem wiring into an adjacent room
change out ceiling light and move existing to the upstairs hallway
paint ceiling to draw attention to the recessed ceiling
art to fill the large expanse of walls
mood lighting for ambiance
a place to put drinks and popcorn for functionality
Design Fee and Estimated Investment
My Design fee was $4500, and I estimated investment at $51K for the goods and labor (not including media equipment)
Contract and Project Kickoff
The proposal and contract were emailed, and we had a call to clarify any concerns/questions. Sometimes the client wants to modify or add to the scope at this point. In that case, I recalculate and re-propose. Once the contract is signed and the Design Fee is paid, we take thorough measurements and communicate with any needed tradespeople. We also collect all the inspiration images from the client, so they know we will bring them what they have in mind.
2. Design Concept Phase
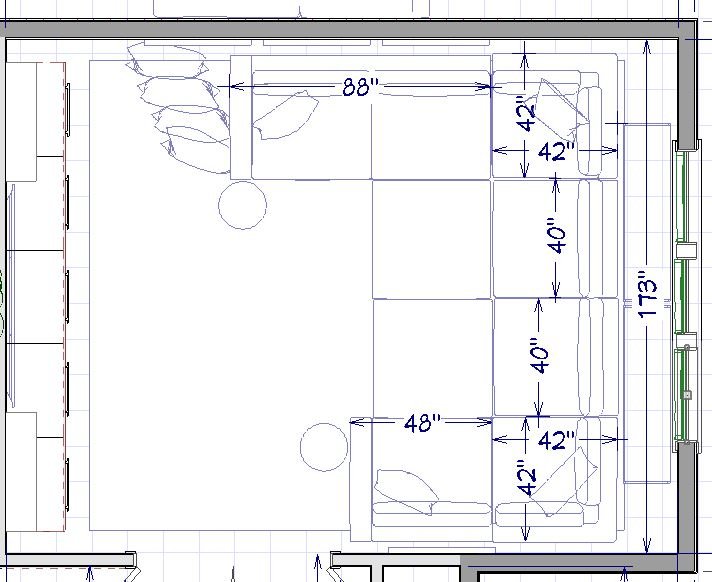
Floor Plan & Elevations
The first step is to design the Floor Plan. Everything else hinges on this, as we need to know exactly what’s going into the space, that we don’t miss a design opportunity, and ensure we maximize every inch. The clients expected investment, feasibility, and efficiency are also top of mind at this stage. Here is the floor plan I created to meet all of this plus my clients dreams and requirements:

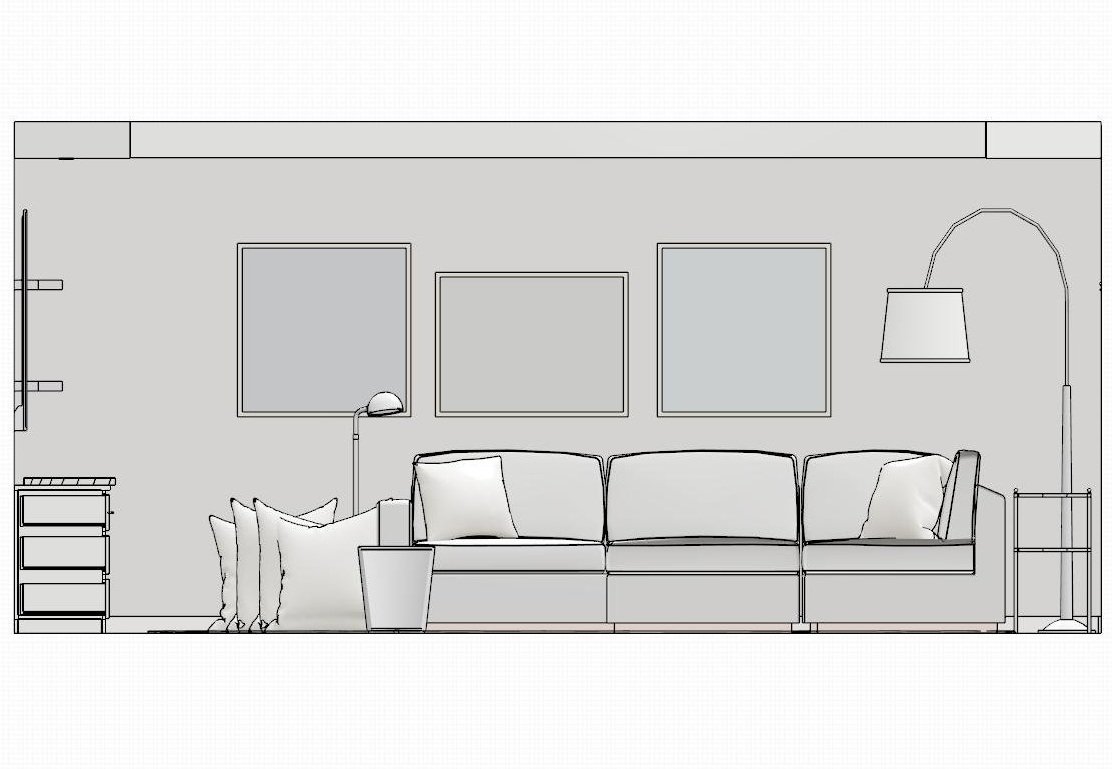
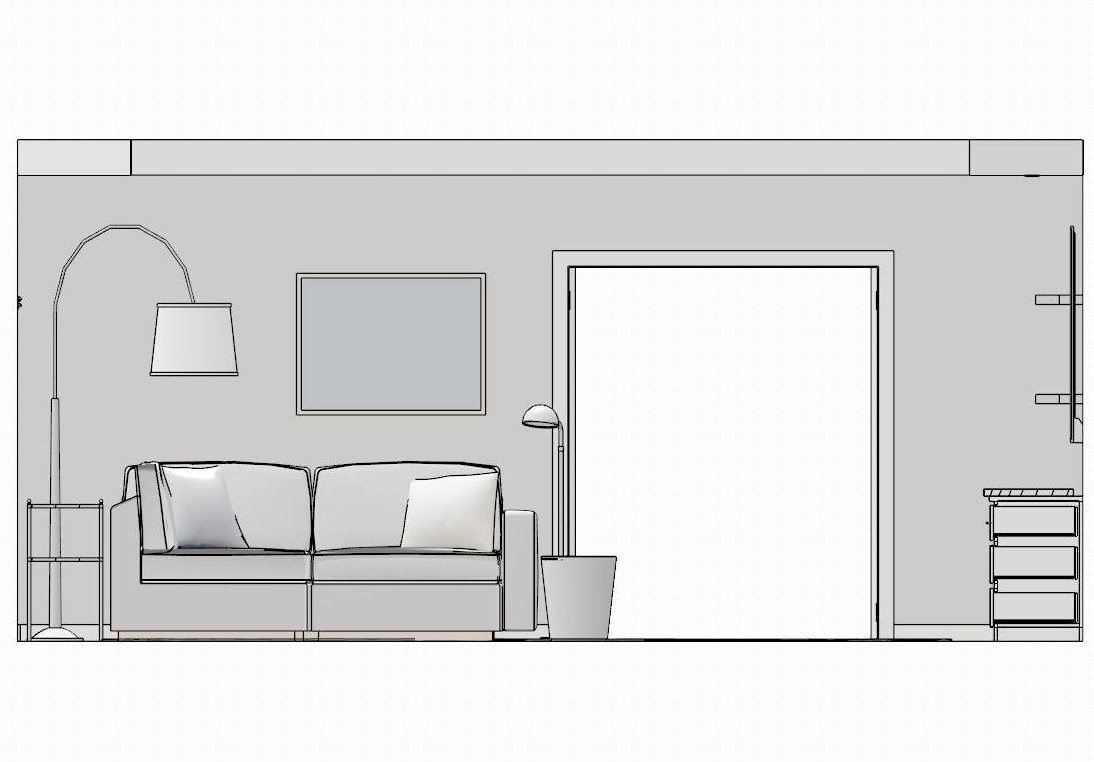
Here are the Wall Elevations that build up from the floor plan, again maximizing every inch and adding interest, function, and balance to the large expanses of wall.
Vision Boards
To help convey the design direction are the Concept Boards. These show photos of the items I am recommending so we can discuss some of the details I’m guiding them towards.
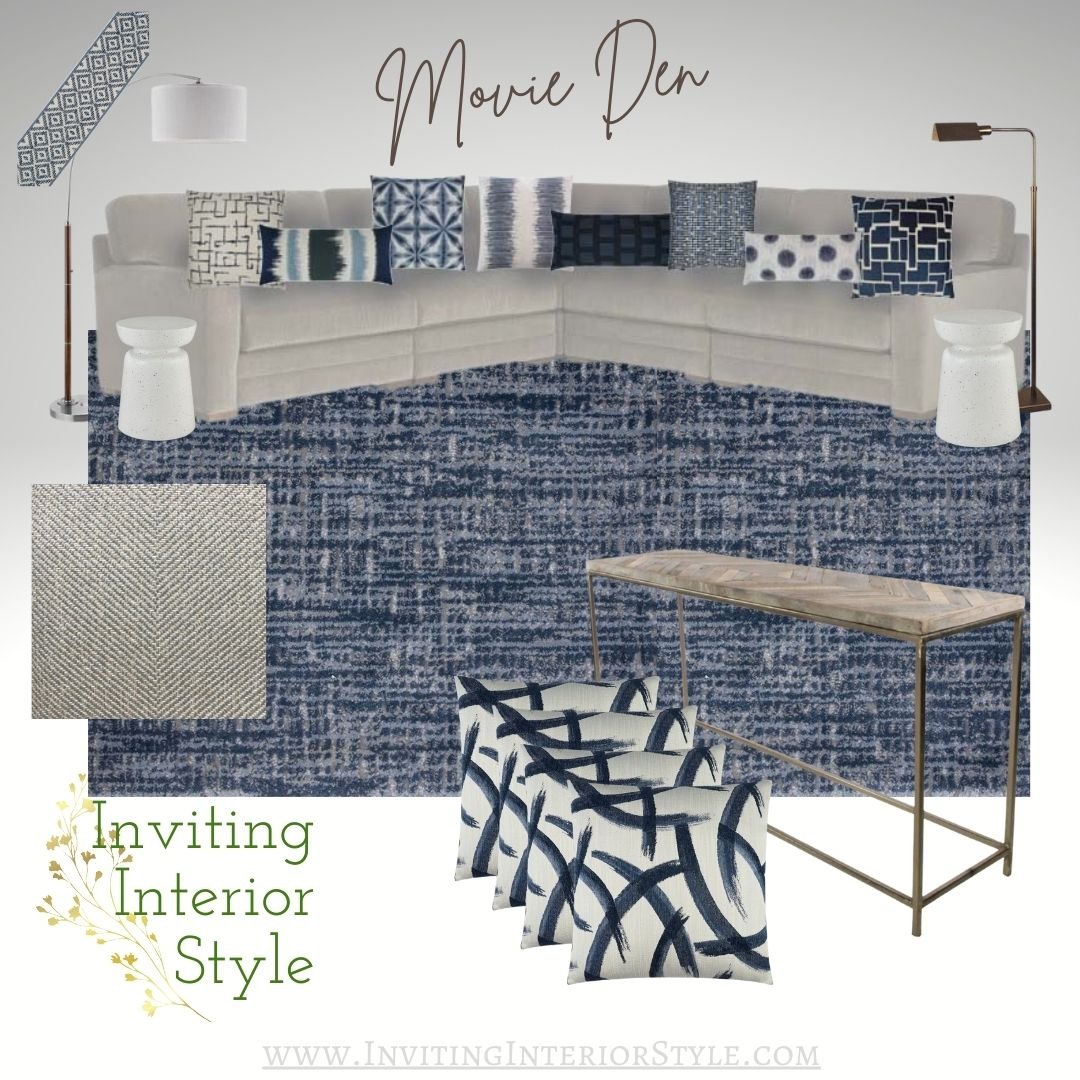
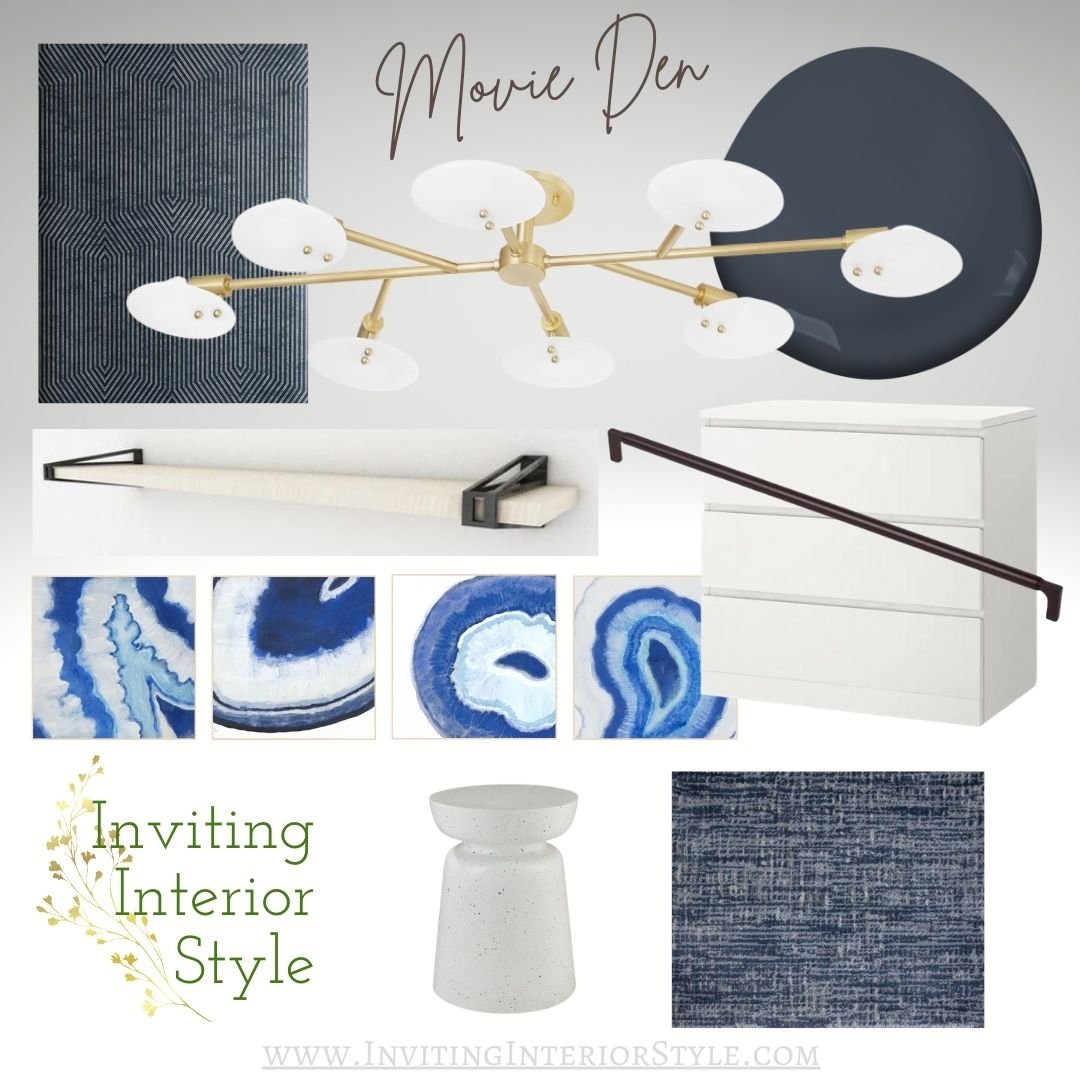
I review these visuals with my clients to open the flow of discussing their specific likes/dislikes. In this session, I need all of their input to ensure my iteration nails their aesthetic.
I take all the feedback and make any needed adjustments to the plans and selections. Then we have a follow-up meeting to guarantee the client is delighted.
3. Detailed Design Plan
After the clients approve the plans and design direction, I get to work on the jillion design details.
Trades and Request for Quote
My favorite part of designing is finding a unique solution to a problem. I love working with craftspeople that have dedicated their lives to creating art with their preferred medium. I dream, I draft and draw up an RFQ. I then find the right artist with the right skills to execute the design.
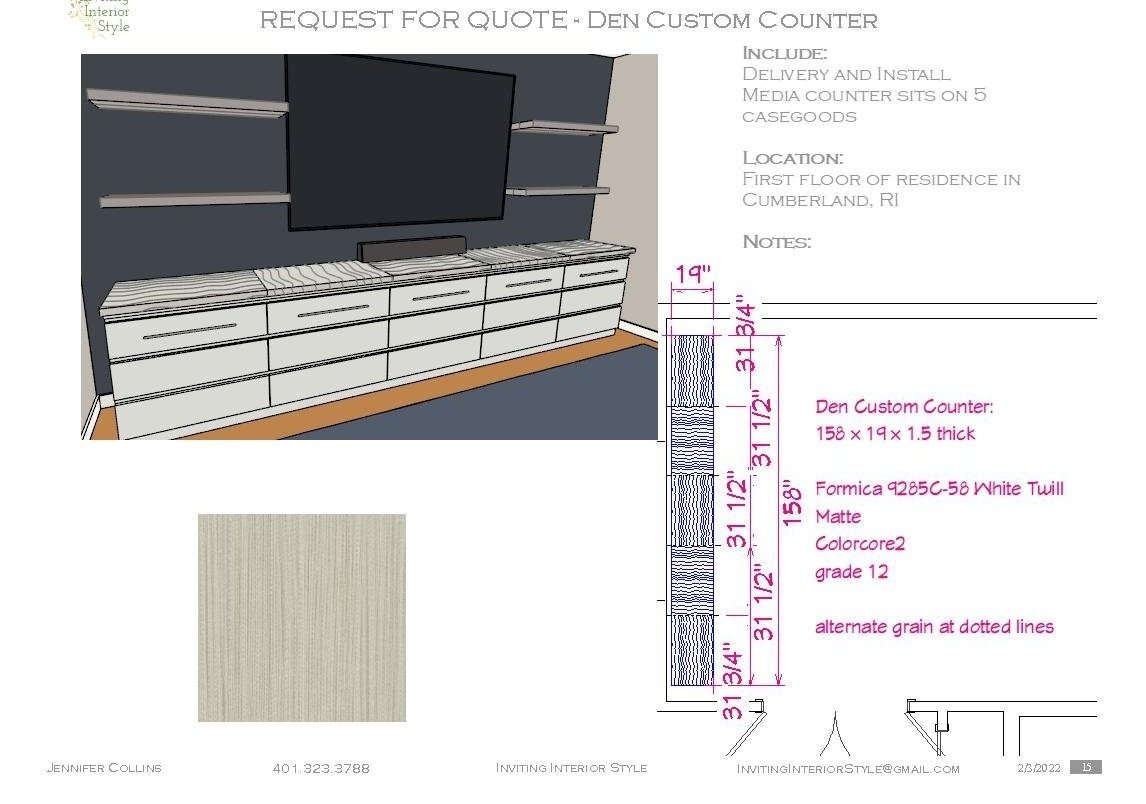
Products and Finishes
In this phase, I source and select all the items for the space. I order finish samples, so I know exactly how durable/soft/colorful it is, and I have no doubt that it is the right choice to work with the other selections. I send and receive the trade estimates from the Request for Quotes, total up all the prices on goods, and create a complete 3D rendering of all the elements in the design plan. The 360-degree renderings bring the floor plan, selections, and concept boards to life!


Design Presentation
At the next meeting, I bring samples of all the finishes, rendered perspective views, and show clients the whole design in virtual reality! This is the best part (until the final reveal, of course!)
These panoramas take a lot of time and detail but are THE KEY to clients having complete confidence that they are investing wisely and getting exactly what they want.
Because of the detailed steps to my process, there are usually no revision requests at this stage, but the option is there if, on a very rare occasion, it is needed. Once final approval is given and payment on goods is made, the purchasing phase can begin!
4. Detailed Order Management
Comprehensive Product Procurement is done for you: Placing orders, Payments, Acknowledgements, Tracking, Receiving, Unpackaging, Inspecting, Assembly, Deficiencies and Damage Resolution, Wrapping, and Storing. Read this for more information.
5. Detailed Renovation
Not all projects involve trades, but most have a painter/paperer, window treatment installer, and electrician. Onsight project communication and timely progress reviews keep a project moving forward efficiently.
There are always surprises that require quick thinking and immediate solutions. It delays a project exponentially when a crew packs up early for the day just because information or a decision is needed to continue.
I am there to represent my clients’ wishes while supporting and working with the trades to ensure that the end result is in line with what the clients are envisioning.
6. Delivery
Once sufficient pieces are received at the warehouse, we coordinate and orchestrate an Install Day. Back in the good old days, we could do one or two installs and really have a fun surprise when it was finished. Nowadays, multiple install days are the norm. They take the panache out of the final reveal but are necessary. No one wants to invest a bunch of money and not see a stick of furniture for a year. And, it really doesn’t make sense to pay storage fees on everything all that time either.
Read this for more information about White-Glove Delivery & Turn-Key Installation.
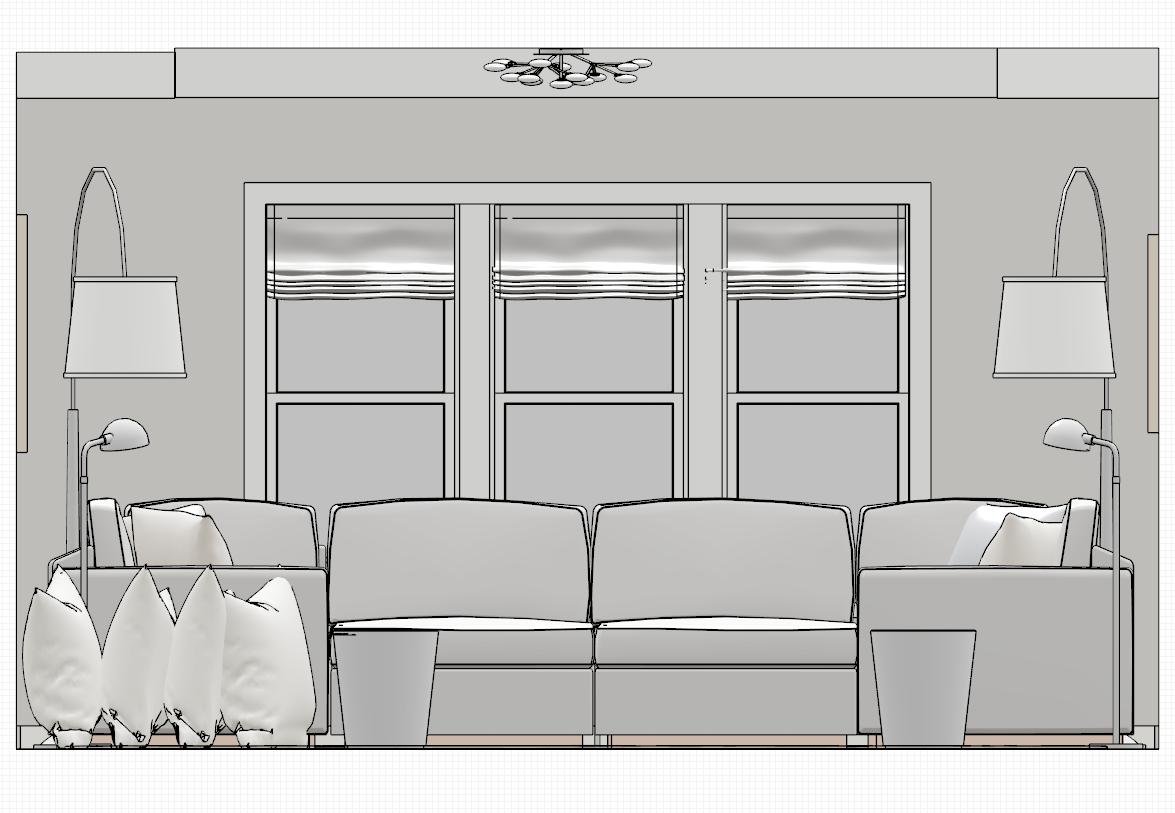
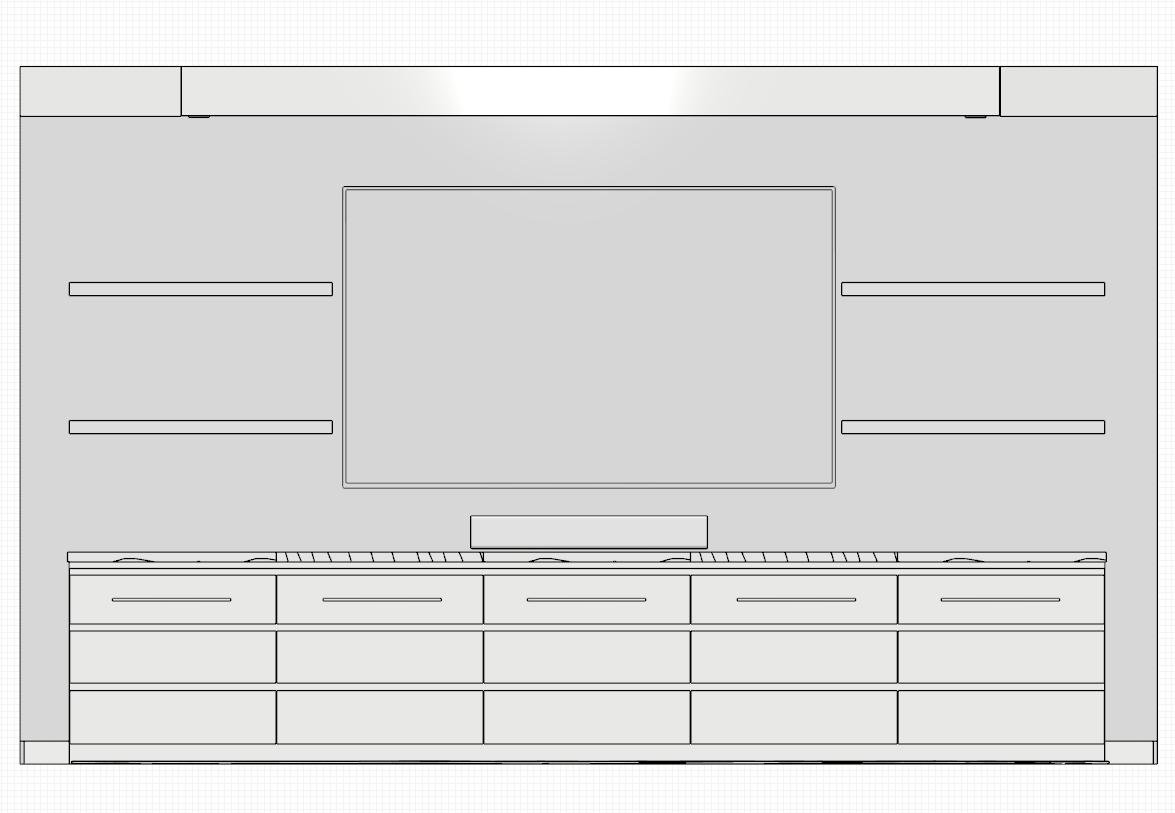
The wallpaper on the TV wall is going up soon, and then the flanking shelves will be right behind. Then, the Final Styling & Reveal and Photography are up next!
Timeline
You may be wondering how long a design project takes? It can vary widely depending on the project’s extent and what’s going on in the world at that time! This project occurred during the global Covid 19 pandemic, so between labor shortages, supply chain disruptions, and the whole world functioning differently than normal, the timeline was quite drawn out.
Every decorating or renovation project has roadblocks and setbacks that can be very difficult and discouraging. Hiring a designer can take a lot of stress and burden out of the process. I am with my clients every step of the way and work with you to solve any problems or challenges that come up, giving you confidence that we will reach a beautiful end result.
Here's a snapshot of the timeline for this project to give you an idea. Long story short, if you have a project you are considering tackling, don’t hesitate to get the ball rolling!
Intro call Jan 2021
Initial Consult Mar 2021
Contract signed and Design fee paid April 2021
Concept developed May 2021
Concept approved June 2021
Furnishing orders placed July and Aug 2021
Carpet Install Sept 2021
First Furnishing Install Nov 2021
Trade days Nov 2021
Addl Install Jan 2022
Addl Install Mar 2022
Upholstery Install May 2022
Addl Install Jun 2022
Trade days Jul 2022 (wallpaper and punch list)
Final Styling Aug 2022 (shelves)
Final Reveal and Professional Photography Sept 2022 (YAY!)
Progress to Date
And here’s a candid peek at the space so far! The full family of 6 + dogums can easily fit on this 9-piece sectional with plush, down-wrapped cushions in performance upholstery with water-resistant inserts. I had the ceiling painted navy to balance the rich rug but also give bold background for the light fixture. The 40” ottos are on wheels so can be easily pulled out and arranged as needed. The carpet is durable yet soft on the elbows. The floor pillows may be my favorite part - they are humongous at 36” square and have generous filling for support!

Investment
Finally, I’ll share what a project with quality products like this costs. You can see how you save money by hiring an interior designer!
Here is the breakdown:
$ 16,813 Upholstered Furniture (14’ x 11’ three-sided sectional in performance fabric, down-wrapped cushions in water-resistant covers)
$ 4,185 Casegoods (2 console tables, 2 occasional tables, 5 cabinets with drawers, pulls, counter uniting all)
$ 3,936 Rug and Softgoods (rug with pad, 12 pillows)
$ 4,179 Wall finishes, Lighting, and Art (4 floor lamps, 2 mood lamps, 4 large framed art canvases, ceiling light, paint, wallpaper
$ 8,734 White-glove freight, receiving, inspection, storage, delivery, and turn-key installation
$ 5,200 Trade labor (painting, hanging wallpaper, shelves, moving electrical)
—————
$ 43,047
I always work with calculated numbers from the outset so clients can plan their investments. I’d rather start realistically and, hopefully, bring it down rather than have surprise overages. I use an average based on past projects to develop my estimates. We came in around $8k under the original estimated investment in this case.
You save money on furnishings by working with me as your designer. In this case, the total client price on all goods was $ 29,113. The retail cost for these items would have been $ 38,038, so the clients saved 9K by purchasing through the firm (which more than offset the Design Fee 😉).
I will update this article as the project finishes so you can see the TV wall and the professional photos that will do this space justice.
What do you think? What did you find to be the most interesting, informative, or surprising? What else would you like to know? I’d love to hear from you, so don’t hesitate to reach out!
